Build your first Dagster project
Welcome to Dagster! In this guide, you'll use Dagster to create a basic pipeline that:
- Extracts data from a CSV file
- Transforms the data
- Loads the transformed data to a new CSV file
What you'll learn
- How to set up a basic Dagster project
- How to create a single Dagster asset that encapsulates the entire Extract, Transform, and Load (ETL) process
- How to use Dagster's UI to monitor and execute your pipeline
Prerequisites
Prerequisites
To follow the steps in this guide, you'll need:
- Basic Python knowledge
- Python 3.9+ installed on your system. Refer to the Installation guide for information.
Step 1: Set up the Dagster environment
-
Open the terminal and create a new directory for your project:
uvx create-dagster project dagster-quickstart
cd dagster-quickstart -
Activate the virtual environment:
- MacOS
- Windows
source .venv/bin/activate.venv\Scripts\activate -
Install the required dependencies in the virtual environment:
uv pip install pandas
Step 2: Create the Dagster project structure
The generated Dagster project should have the following structure:
.
├── pyproject.toml
├── src
│   └── dagster-quickstart
│       ├── __init__.py
│       ├── components
│       │   ├── __init__.py
│       ├── definitions.py
│       └── defs
│           └── __init__.py
├── tests
│   └── __init__.py
└── uv.lock
-
Create an assets file using
dgin the terminal:dg scaffold defs dagster.asset assets.pyThis will add a new file
assets.pyin thedefsdirectory:.
└── src
└── dagster-quickstart
└── defs
└── assets.py -
Add the
sample_data.csvfile:mkdir src/dagster-quickstart/defs/data
touch src/dagster-quickstart/defs/data/sample_data.csvWithin this file add the following content:
id,name,age,city
1,Alice,28,New York
2,Bob,35,San Francisco
3,Charlie,42,Chicago
4,Diana,31,Los Angeles
This CSV will act as the data source for your Dagster pipeline.
Step 3: Define the assets
Now, create the assets for the ETL pipeline. Open src/dagster-quickstart/defs/assets.py file in your preferred editor and include the following code:
import pandas as pd

import dagster as dg


@dg.asset
def processed_data():
    ## Read data from the CSV
    df = pd.read_csv("src/dagster-quickstart/defs/data/sample_data.csv")

    ## Add an age_group column based on the value of age
    df["age_group"] = pd.cut(
        df["age"], bins=[0, 30, 40, 100], labels=["Young", "Middle", "Senior"]
    )

    ## Save processed data
    df.to_csv("src/dagster-quickstart/defs/data/processed_data.csv", index=False)
    return "Data loaded successfully"
This may seem unusual if you're used to task-based orchestration. In that case, you'd have three separate steps for extracting, transforming, and loading.
However, in Dagster, you'll model your pipelines using assets as the fundamental building block, rather than tasks.
Step 4: Run the pipeline
-
In the terminal, navigate to your project's root directory and run:
dg dev -
Open your web browser and navigate to
http://localhost:3000, where you should see the Dagster UI: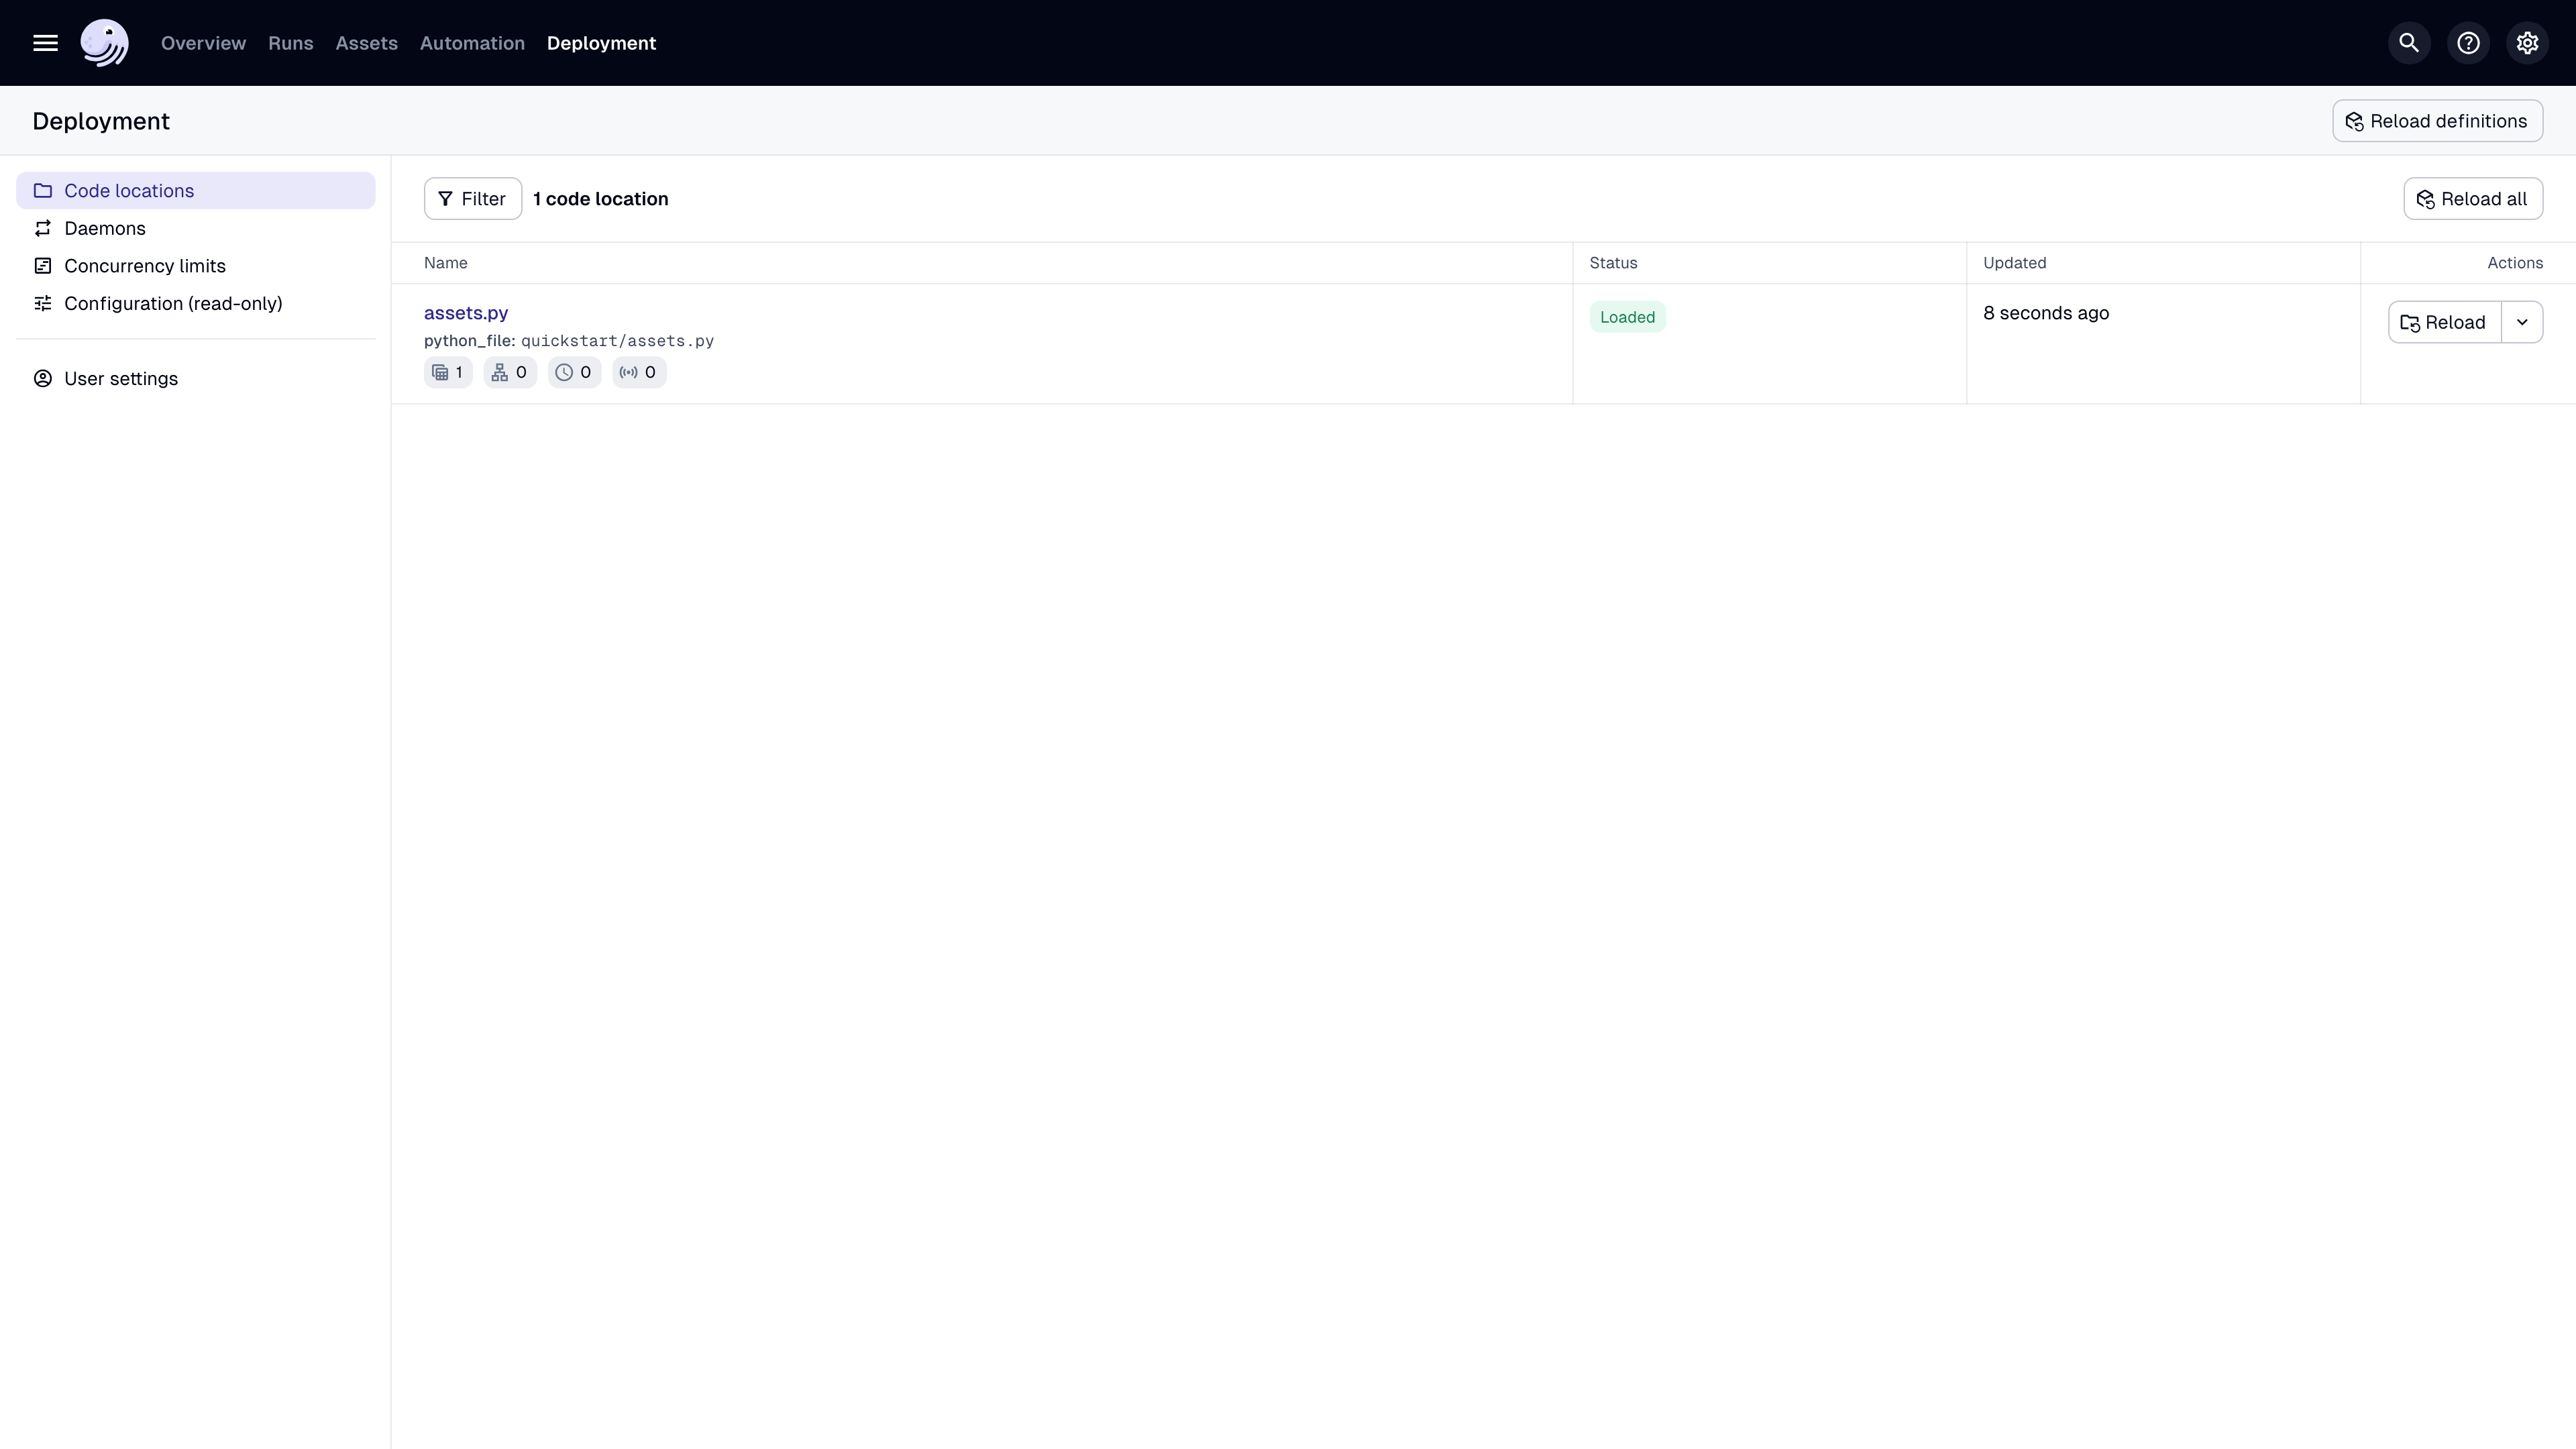
-
In the top navigation, click Assets > View global asset lineage.
-
Click Materialize to run the pipeline.
-
In the popup that displays, click View. This will open the Run details page, allowing you to view the run as it executes.
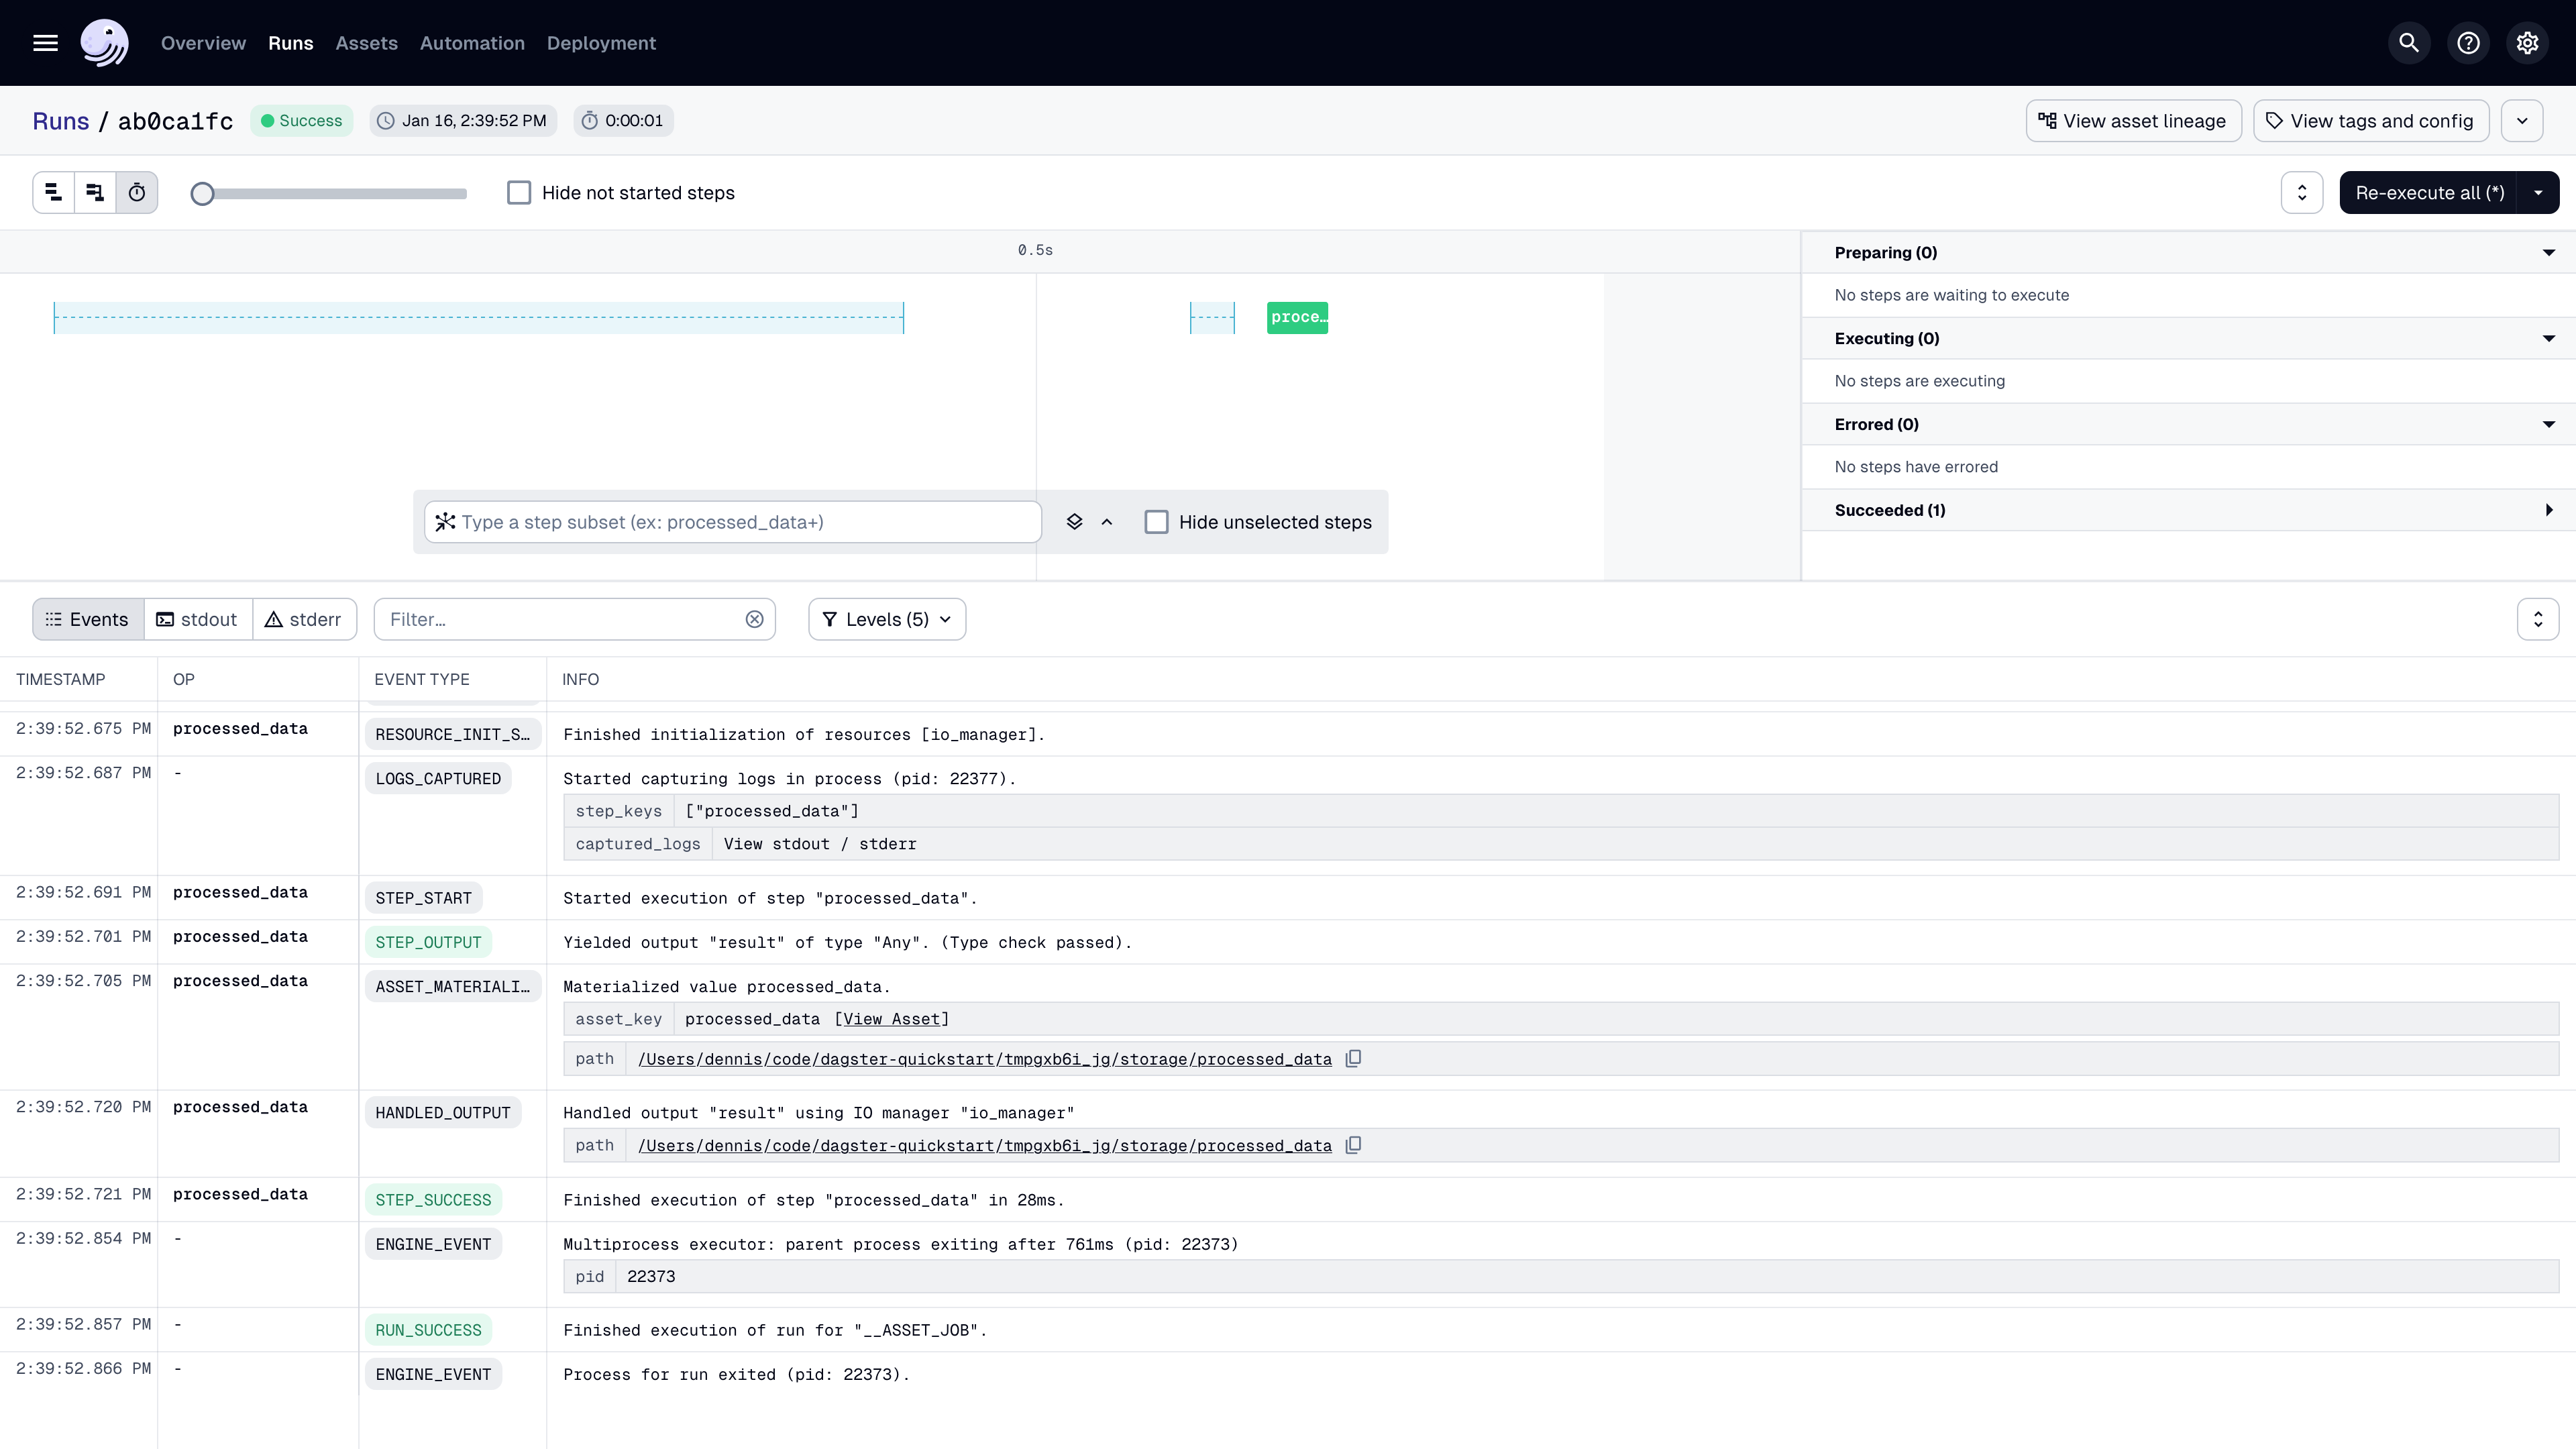
Use the view buttons in near the top left corner of the page to change how the run is displayed. You can also click the asset to view logs and metadata.
Step 5: Verify the results
In your terminal, run:
cat src/dagster-quickstart/defs/data/processed_data.csv
You should see the transformed data, including the new age_group column:
id,name,age,city,age_group
1,Alice,28,New York,Young
2,Bob,35,San Francisco,Middle
3,Charlie,42,Chicago,Senior
4,Diana,31,Los Angeles,Middle
Next steps
Congratulations! You've just built and run your first pipeline with Dagster. Next, you can:
- Continue with the ETL pipeline tutorial to learn how to build a more complex ETL pipeline
- Learn how to Think in assets